Table of Contents
How to Configure Fields in Form Builder
Accessing the Field Configuration
Change the Order of a Field on the Form
How to Set Up Various Field Types
How to Configure Fields in Form Builder
The HS Form Builder tool allows the system Administrator(s), to modify and configure the tools (data entry screens) within the system. The Form Builder is located under Admin Tools on the main navigation. This article focuses on the creation and use of field types and field properties.
Accessing the Field Configuration
-
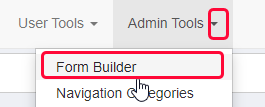
Click on Admin Tools and select Form Builder.
-
All the tools currently available are shown. To select one, click on the icon.
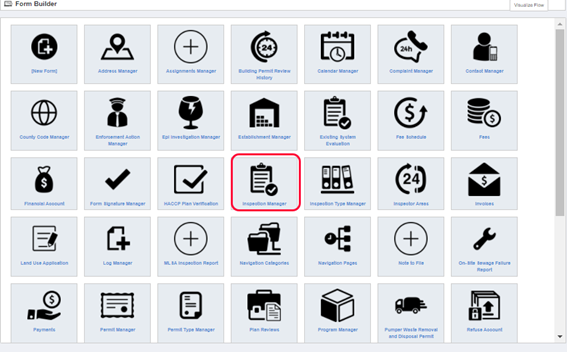
The “Fields” row has 3 options: Configure; Quick Edit; and Download Existing.
-
Configure presents the editing screen
-
Quick Edit allows for bulk uploading
-
Download Existing creates a spreadsheet with most of the field properties
-
Click on Configure to open the Fields Editor.
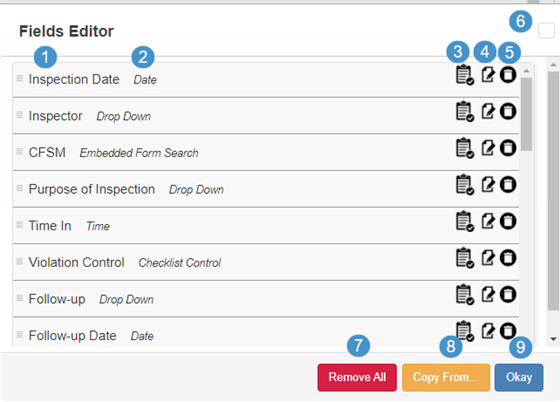
Starting from the left side, is (1) the Label name; (2) the field type; (3) Create Copy icon; (4) Edit icon; and (5) Delete icon.
The top right corner of the frame has (6) the exit button.
The bottom right corner of the frame has (7) Remove (all fields); (8) Copy From (other forms); and (9) the Okay button (to close the editor after editing).
-
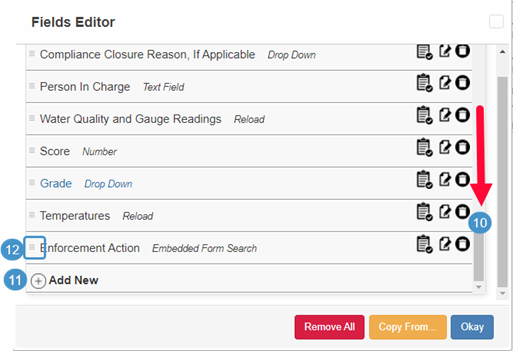
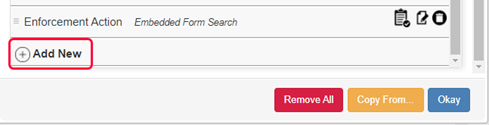
Scroll down using (10) the inner scroll bar to see (11) Add New; and (12) field order arranger.
Field Types
Field type defines how a data point will behave and what type of data it will collect. This article will describe the most commonly used options.
-
Click on Add New to open a new field entry.

-
Click on Select a Type to see the drop down choices.
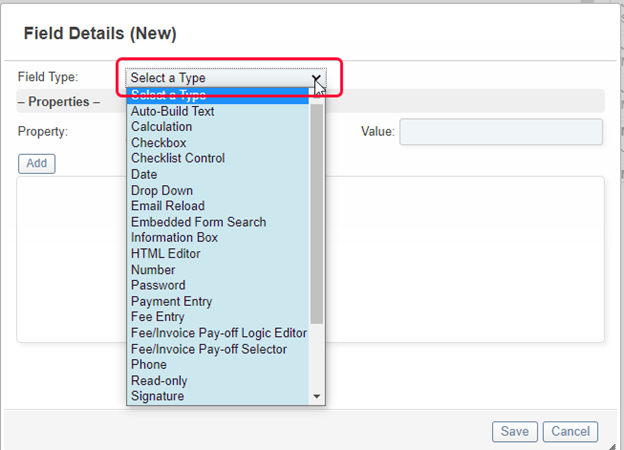
Notice that the list is extensive and can be further viewed by scrolling in the box.
Field Labels and Fieldnames
Every field must have a Field Label Property value and a Fieldname Property value.
The default Property displayed is “Field Label”. The Label value is the descriptor that will be displayed in the data entry screen.
After typing the field label name and adding it, a default Field id property will be created with this syntax:
Permit Number will be named PermitNumber.
Spaces between words in fieldname ID’s are deleted. All “special characters” will be deleted. The ID can be edited for a custom fieldname.
Adding a Simple Text Field
-
Click on Configure (Fields) and scroll to the end of the field list and click on Add New.
-
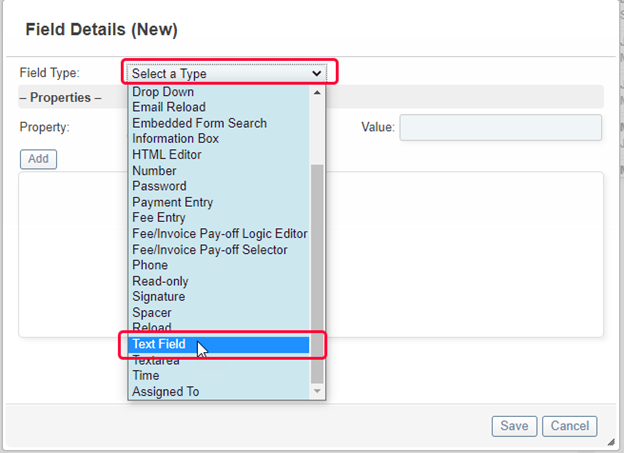
Click on Select a Type and scroll to Text Field. The list is in alphabetical order.
-
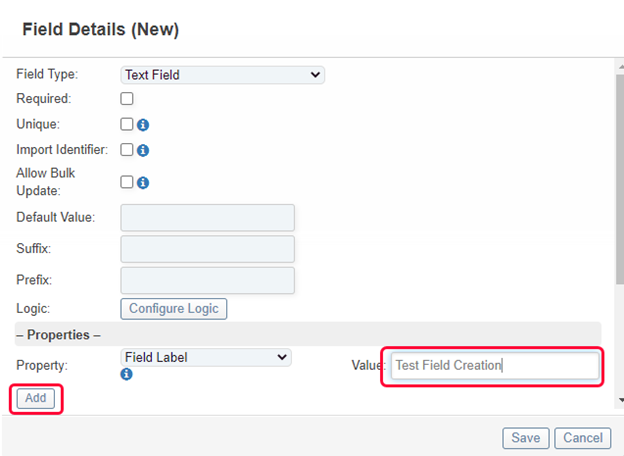
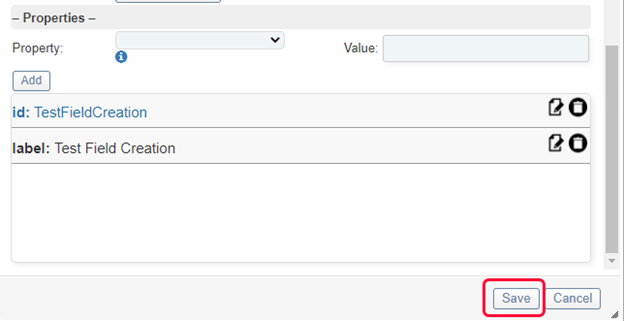
Type the field label value and click on the Add button.
-
Scroll down to see that the fieldname id value was created as well. Click on the Save button to create this simple field.
-
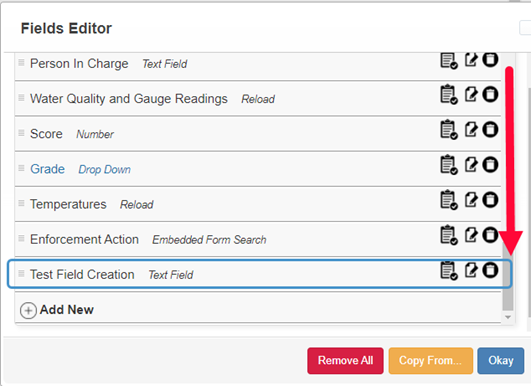
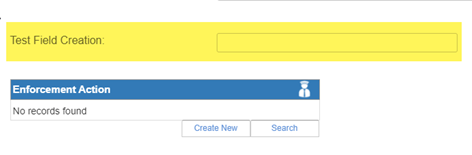
Scroll to the bottom of the Fields Editor to see the new field.
Change the Order of a Field on the Form
-
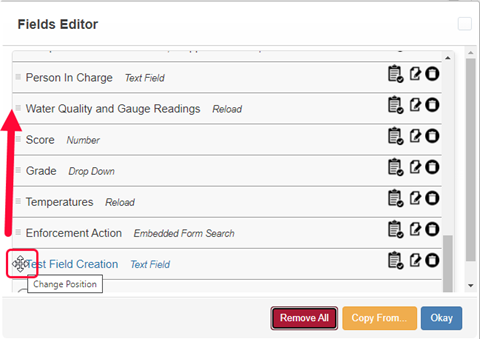
To change the position of the field in the form, use the change position icon in front of the field’s name. Hover over the icon and drag the mouse up, but not out of that frame. Find the field again and repeat as necessary until the desired position is reached.
-
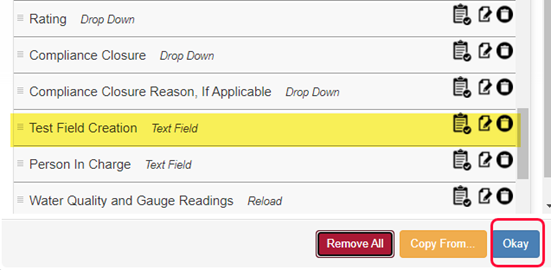
Click OK to close the Fields Editor box.
-
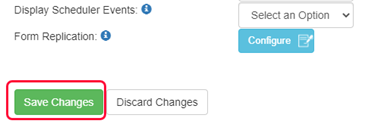
At this point the Form Builder must be saved to save the new changes. Scroll to the bottom of the Form Builder and click on Save Changes button.
-
Open the data entry form associated with the new field to view. If the form was already open, the “cache” must be cleared to see the changes. To clear cache, click on your login name and then click Clear Cache.

Sample:
Other choices in the Field Details box are described here: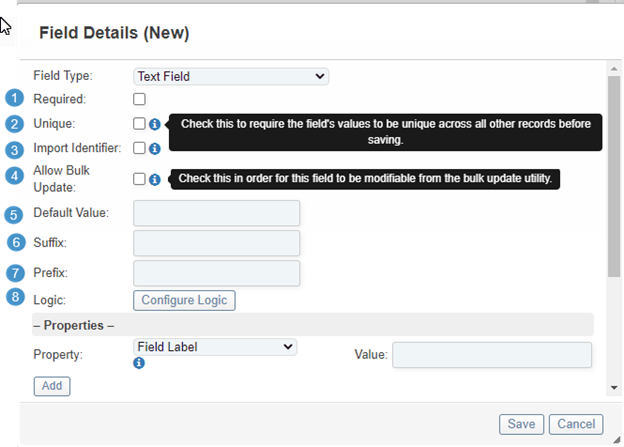
-
(1) Tick the Required box if data must be entered before the record will save.
-
(2) Don’t use this unless advised.
-
(3) This is an internal choice during import, if needed.
-
(4) When Bulk update is activated, selected records in a List view can be updated with a new value. Eg: Status change.
-
(5) A value is automatically entered into a new record.
-
(6) A character string can be added after each value. Eg: hours, minutes etc.
-
(7) Same as (6) but the character string precedes the value.
-
(8) This is advanced. The field can be controlled based on a choice in another field or form builder field.
How to Set Up Various Field Types
Only the highlighted field types are described here. If other options are needed in your system, HealthSpace representatives will add them or explain how to use them.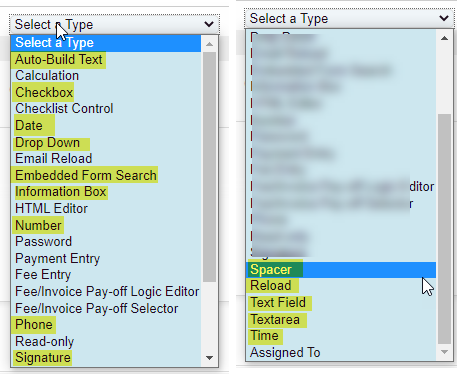
Auto-Build Text: Sets up a sequential numbering system, that can include multiple data points in the system. For example: Setting up a permit number, and the number will contain a program code, a county code, and then a sequential number. Here is an example of what that would look like. The fields or data points that build the text, must exist before the setup. The formula is created from the created text inputs and characters noted as characters.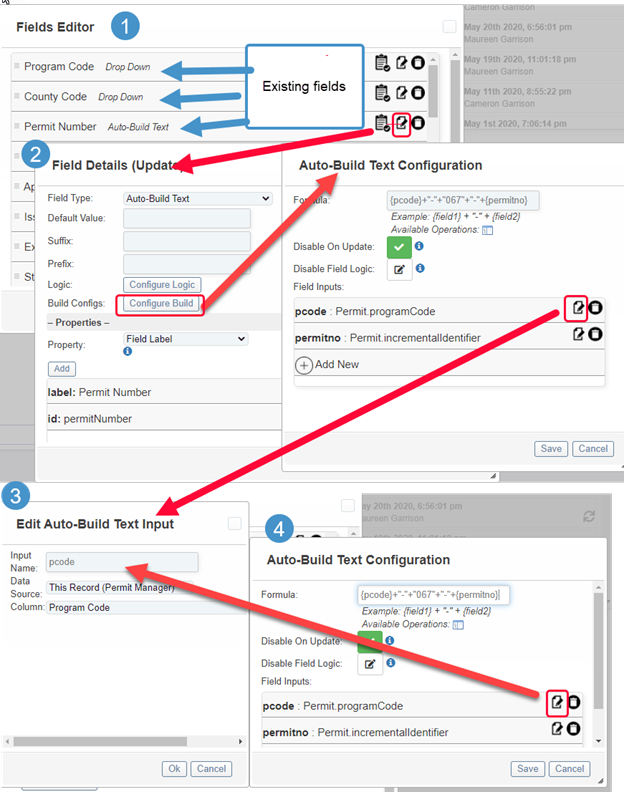
This is what is generated in the form: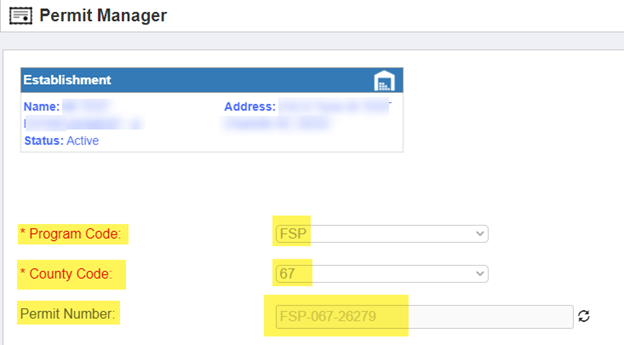
Checkbox: Checkboxes allow the choice of multiple values from a list in Configuration Options, rather than just one. For example: If a field is used to select the months of the year a business is open, the checkbox option is used.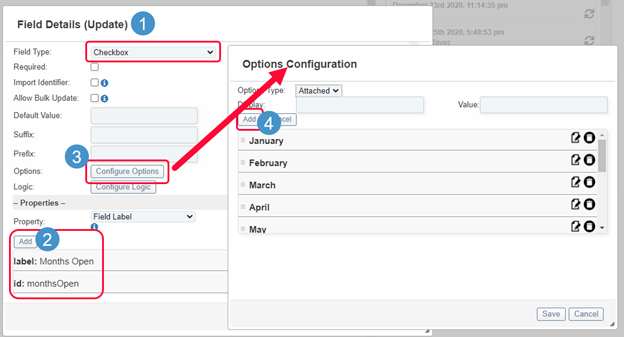
Example:
Date: Formats the field to collect the data in a calendar format. When collecting or setting up a date field in the system, always use this field type to filter by date in lists or reports.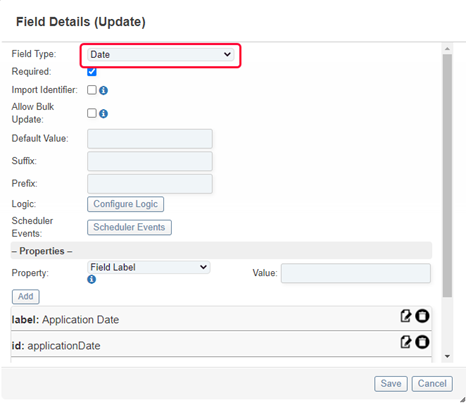
Example:
Dropdown: A dropdown is used when there is a list of values the user should choose from, but only one may be selected. For example, for a “Status” dropdown, set up the Status field, choose Dropdown for the type, then set up the values.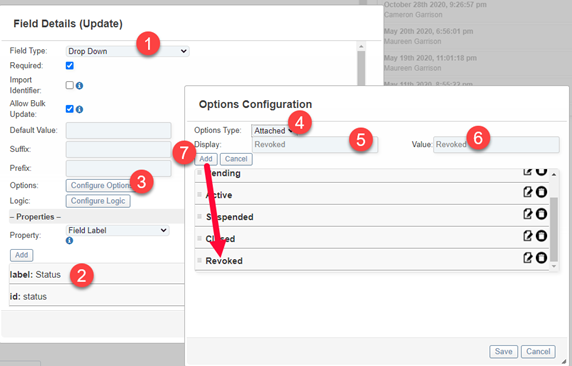
Drop Downs are often connected to another form (Data Source) such as a list of County Codes.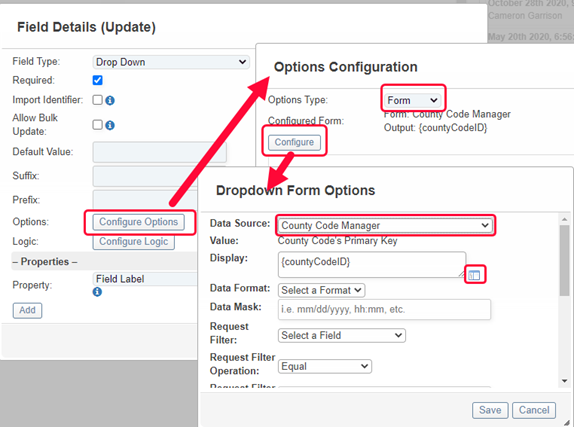
Example:
Embedded Form Search: If a form does not have a parent but collects data from other forms, these forms can be embedded. An example would be a Complaint Form that may or may not be associated with an Establishment and only has an address supplied by the complainant.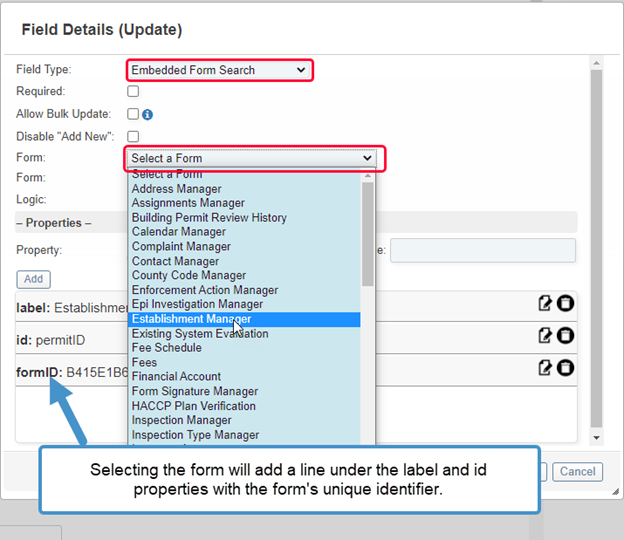
Example: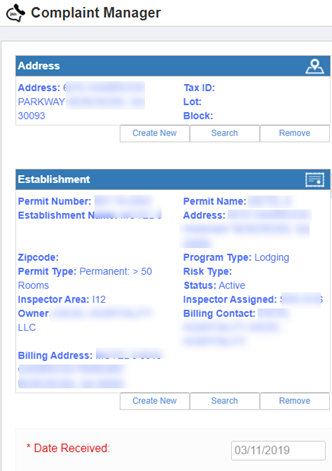
Information Box: This is static, read-only text that displays at the spot of the screen where the field is placed. For example, if underneath, or above a certain field, instructions or a note will display in the record in that location.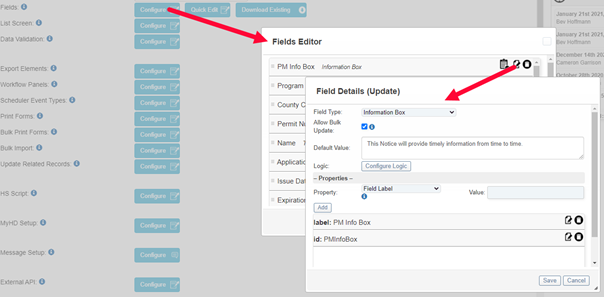
Example: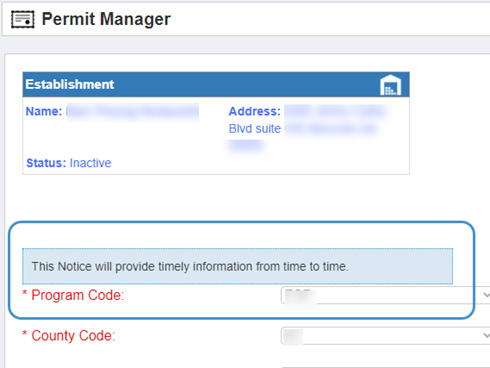
Number: This field type will enforce that only a number value can be entered into the data entry field. This allows for mathematical reporting and number formatting in forms and printouts. A field for “Number of Seats” would use the number field type, so that users cannot enter a text value into the field.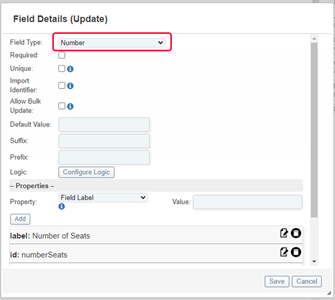
Example:
Phone: This field type enforces a format for entering phone numbers. For example, ‘Facility Phone’ would have a field type of “Phone”. The user types 10 digits (area code and number) then up to 7 digits for an extension.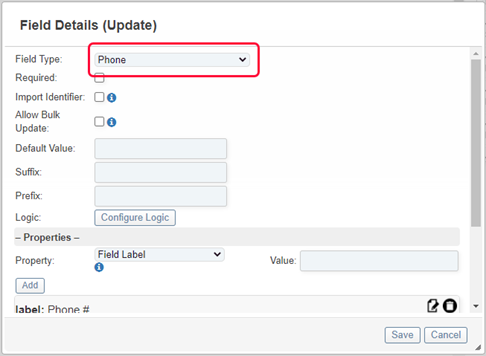
Example:
Signature: This field type is for signature collection that is used on inspections and some other forms. This allows for drawing on a device screen. Signature fields should only be used on forms, like inspections, that are available on a tablet like the iPad or any Windows touch screen, where a user can actually sign the screen. Although a mouse can be used to draw as well.
Examples:
Below: HealthSpace Cloudsuite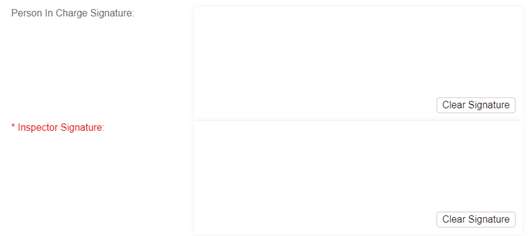
Below: HealthSpace Touch App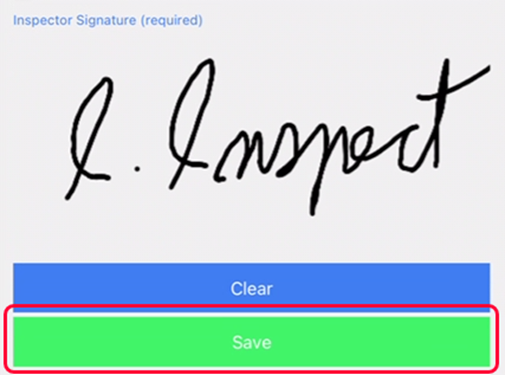
Spacer: This field type inserts white space on your screen for a better visual display on the data entry form between fields.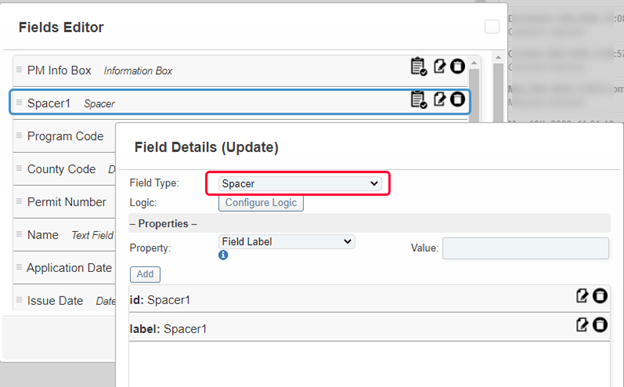
Example: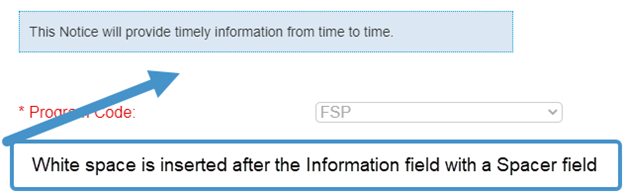
Reload: This field creates a ‘table within a table’, also known as a subform. These are most often used when there are multiple rows of the same type of data which is a part of the main form. For example, temperature collection on the inspection, is a ‘reload’.
When creating a reload it is important to place underscore characters between the words of the “Field ID” if the table will be matched in the Violation Library. Edit the id to place the underscore characters and then Add it back in.
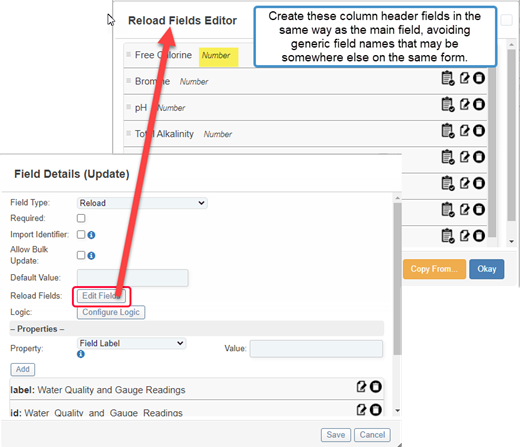
The columns are created as fields as well by clicking on “Edit Fields” to define the data entry fields that should be part of the reload. When creating the fields within the reload it is important to name their Field ID uniquely in case the field id already exists in that form. Generic names such as notes, name, type, temperature etc. should be avoided.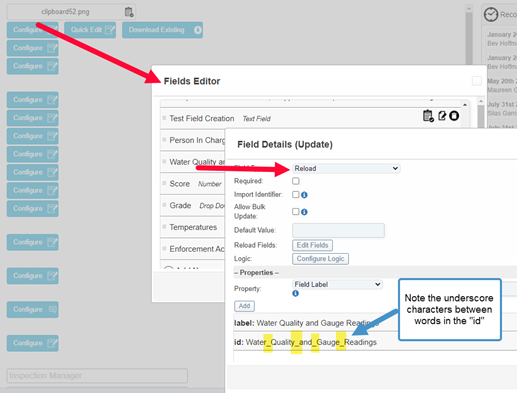
Example:
Reload Table Data Entry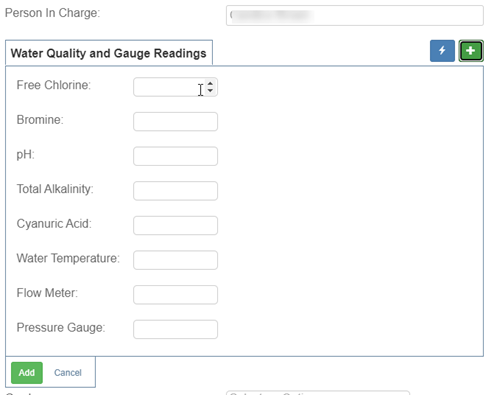
Record saved to reload table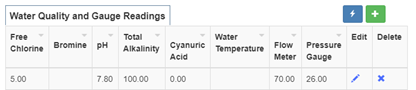
Text: A text entry field that allows for the entry of any text displayed in the form on one single line and is not a part of a list or unique. 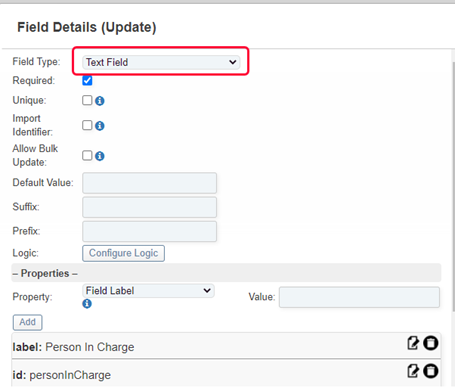
Example:
Textarea: A text entry field that allows for the entry of any text that can be divided into paragraphs or large amounts of text. Text for ‘Comment’ fields, or fields where data might be copied into. The box width and height stretch to reveal the text.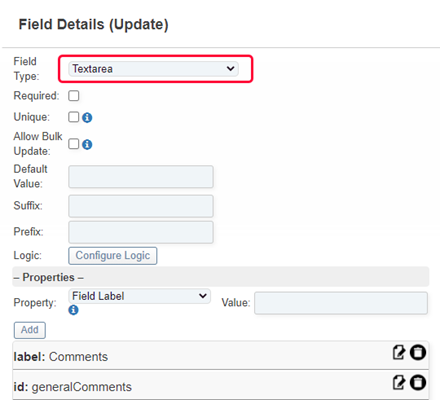
Example:
Time: The time field type enforces the format entry of a “Time” using a “clock” feature. For example, “Time In” would have a field type of “Time”. Any time fields should be set up with a type of Time to report on calculated time. Extra properties can be used to further enhance the data entry and display.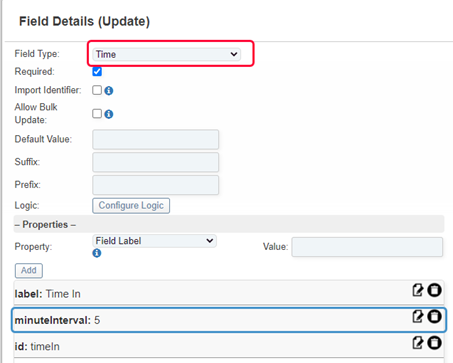
Example:
Optional Rules for Fields
Setting a Required Field: Any data entry field in the system can be marked to require that a value has been entered in the field before a record will save. Check “Required” in the Field Details window. The field name text displays in “red” with an “asterisk” in front, and entry will be enforced, before the record can be saved.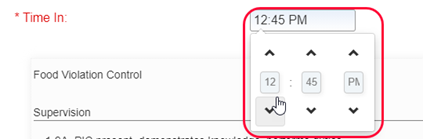
Example:
Required field must be used before a record will save.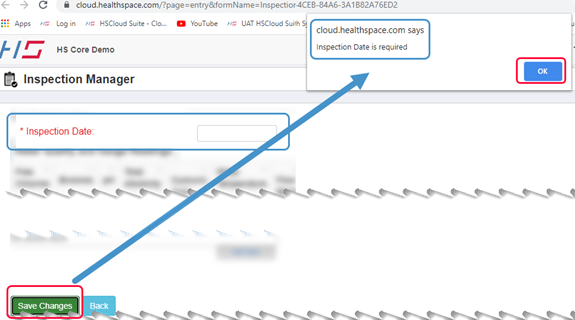
Setting a Default Value: Most fields will allow for a default value. A value from a list can be typed in as a default and will display in any new records.
Example:
Edit a field and then open a new record.
Setting Show/Hide field Logic, Calculations and Other Special Rules: These operations can be quite complex and use the “Configure Logic” button. We recommend contacting a HealthSpace representative for guidance or support. Here is an example of hiding a field when another field has a certain value.