NOTE: This article has not been updated for the newer "List Screen Supreme" but does contain helpful information.
All tools in the system have a list screen. With most tools, the list screen is displayed when accessed from the Navigation. A list screen summarizes data fields chosen from the Field list. The list screen shows all records for a tool and allows for searching text and numbers. Manipulating the list with the use of filters and choices on the Action menu produces reports that can be exported. New records are added from the list screen if the tool allows.
Features of a List Screen
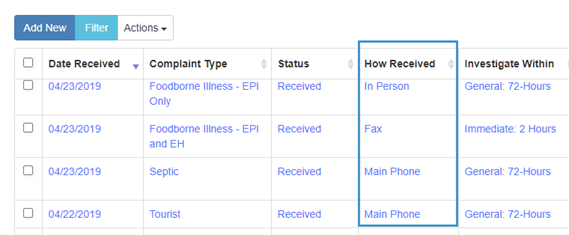
Here is a common list screen: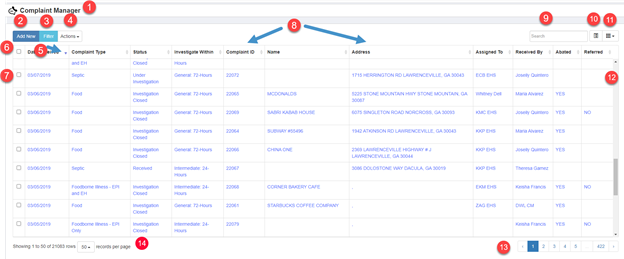
- Icon and Tool Title
- Add New button – Not all list screens will have an Add New button. Some forms need to be created from a parent form using the Workflow panels.
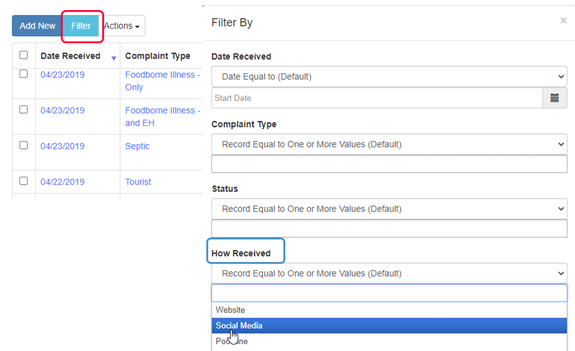
- Filter button – When setting up a field, the option to filter by its data. The choices available will be dictated by the choice being used in the list and the type of field.
- Actions Menu – When rows are selected, actions such as Print a form or Export data are available.
- Sort order indicator – The first column in the list is the default sort but the list can be sorted by any column.
- Select All tick box – Select all records that are currently displayed.
- Select a record tick box – Select multiple rows.
- Labels for data fields – List items can have their own custom labels, which are not necessarily the fieldname label.
- Search box – Searches all fields for a character string unless the field has been configured to be “non-searchable”.
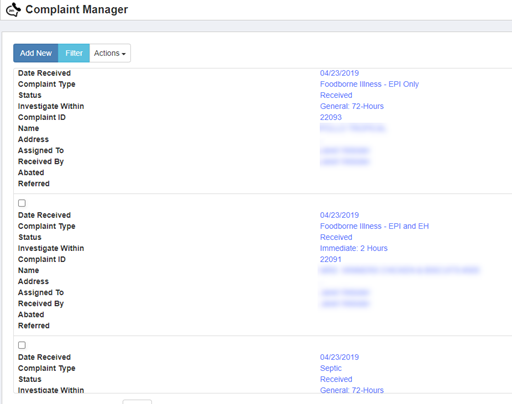
- Switch to alternate view – This can be appropriate for some utilities, but the default is more useful for most.
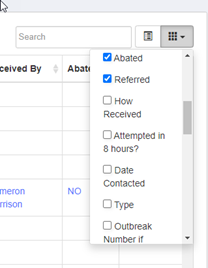
- View all visible and hidden columns – Columns can be selected or deselected for the current view.
- Scroll bar – Scroll to see the current page of all shown records.
- Page navigation – Move through the pages by selecting the page number or use the “next” arrow at the end of the display.
- Records per page; number of total records in the list; and number of records showing – After filtering a list, choose to see more than the default 50 records per page. The total number of records returned is displayed here.
Adding a Column to the List Screen
The user must have administrative rights to view and use the Form Builder.
List screens can show data from other utilities by creating a Data Lookup and specifying that lookup as the source. Fields that are from the same utility do not need a separate lookup created. This resource will not show how to create a Data Lookup. The columns will be from lookups already created.
Please note that only one user can save changes at a time while in a utility of the Form Builder.
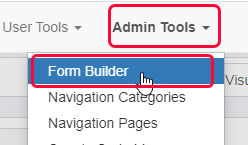
- Click on Form Builder from Admin Tools on the main navigation.
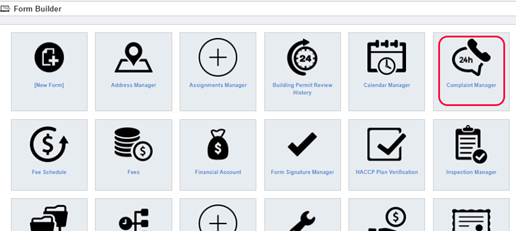
The page displaying all the utilities is shown. - Click on the panel of the utility.
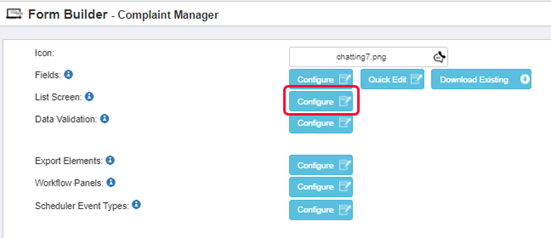
The configuration form is displayed. - To see the fields in the List Screen, click on Configure beside List Screen.
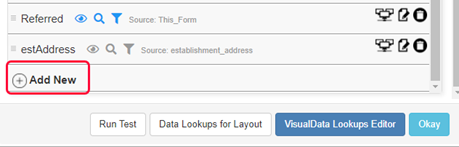
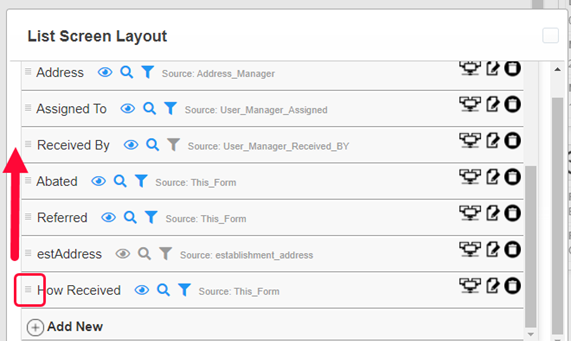
- The List Screen Layout dialog box is displayed. These are descriptions of the elements in the List Screen Layout:
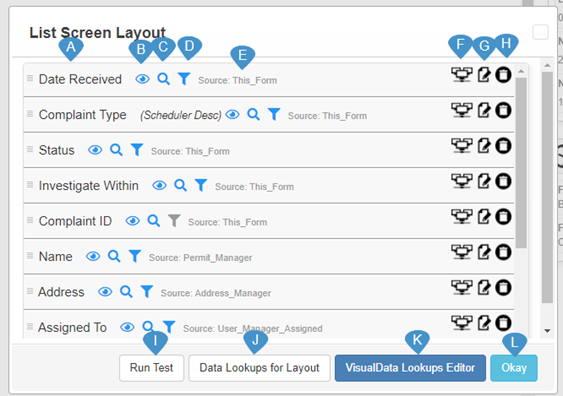
A. Label name given.
B. When the “eye” is blue, the list field will not be hidden from the display.
C. When the “magnifying glass” is blue, the field is searchable.
D. When the “funnel” is blue, the field can be filtered.
E. Displays the source of the data from the Data Lookups.
F. Gives the user the ability to copy the field to other forms.
G. Edit the Properties of the List screen column.
H. Delete the List screen column.
I. Before saving Run a Test for errors that could “break” the list.
J. View, create, edit or delete Data Lookups in this list.
K. More in depth look at the Data Lookup properties.
L. Close the List Screen Layout. This does not publish the changes made. - Scroll to the bottom of the list and click on Add New. (Make sure the other “buttons” are not selected)
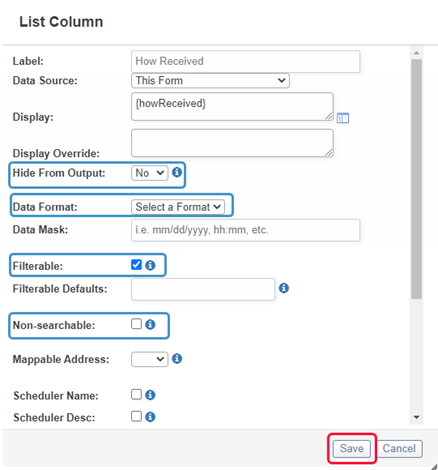
- Next, fill in the List Column information as shown below in the next steps:
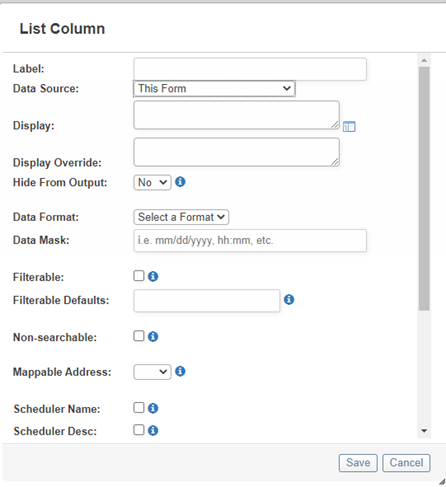
- Give the column a concise explanatory name. It does not have to be the original field name label.
- Select the data source or leave as This Form for fields in the utility’s field list.
- Scroll in the Display Selector to find the field name label.
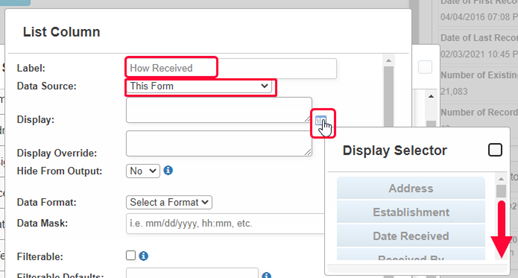
- Select the field name label.
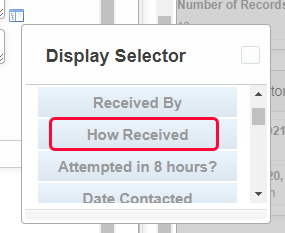
- The field name id will be displayed with curly brackets.
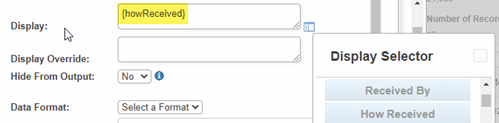
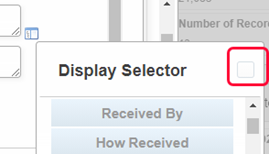
- Close the Display Selector. (Multiple selections may apply. Eg: firstName, lastName)
- Fill in any other needed choices such as Hide from Display. If a field is a number, phone number, date, or time field, select a Format. The Data Mask has defaults set for these, so it may not be necessary to enter a specific mask. If the field has dropdown choices, it could be advantageous to make the column filterable, with a default choice. If the data will not be filtered or searched for, choose to mark it as Non-searchable. This will speed up searching. Lastly, save the column.
- The List Column window closes, and the new list column is now at the bottom of the List Screen Layout.
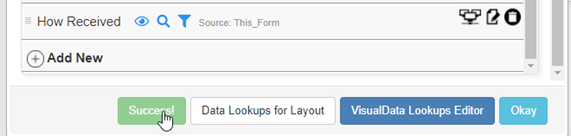
- The most important step is to “Run Test”. If there are errors, DO NOT SAVE the Form Builder as an error will “break” the list and impact other users. Submit a support request with screenshots of the error and the settings, then remove/delete the column.
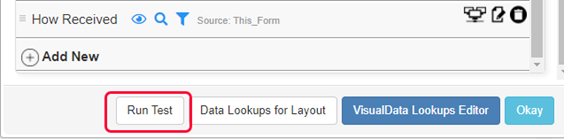
- If there are no errors, the Run Test button will temporarily display “Success!” with a green background.
- Use the “Move” icon to drag the field to another location, a few fields at a time. Dragging is limited to the area shown, not the area outside of that.
- Click on OK to close the List Screen Configuration.

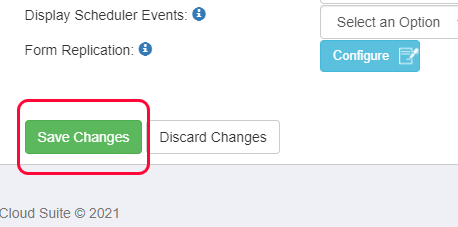
- The Form Builder MUST BE SAVED to publish the changes. The Form Builder will NOT ask the user to save the page before closing. To save the Form Builder changes scroll to the bottom of the page and click on Save Changes.
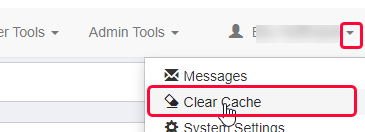
- If the Form Builder is closed or the Cache cleared, the Record History will record the user’s name and Time (GMT) of the last Save. There is a reversal button beside each entry. Consult HealthSpace Support before making a change to avoid anything unforeseen.

- If the Utility’s List View page was open, clear cache to refresh the page.
- View the new column.
- Click on the filter button to see the column listed.