Table of Contents
Overview of Search Features in the System
Searching in Version 2 Interface (Accounting Tools)
Overview of Search Features in the System
Throughout the system are List Screens, Embedded Forms, and Workflow Panels that have search as an option. The dashboard also has a “Search System” option as well. The Accounting Tools interface also has specific ways of presenting the Search option.
List screens allow for “Search as you type”.
Embedded forms use a Search Button to open a search field.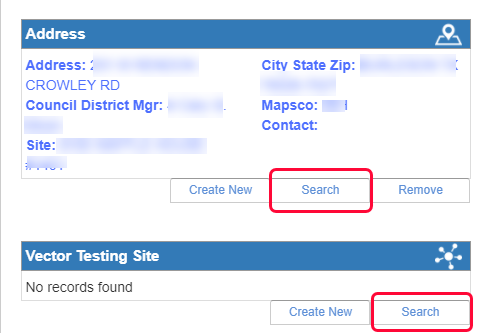
Workflow Panels use the Actions menu to start the search.
Search System, located on the Dashboard, has a dropdown of the Tool to be searched. The Tool names are in alphabetical order.
In the Version 2 interface of the Accounting tools, there are search bars and buttons.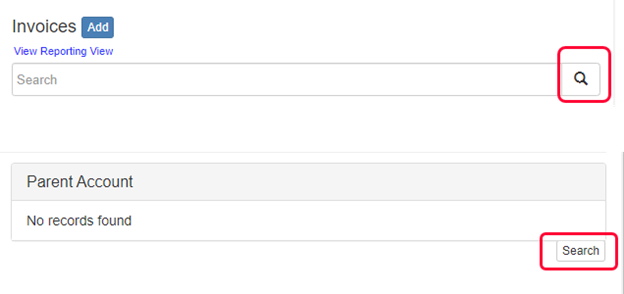
Searching a List Screen
Start typing, and after 3 characters are typed, the list starts to filter on screen. If a column has been specified as “non-searchable” it will not be included in the search.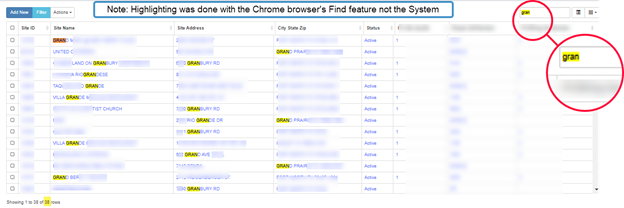
Notice that the list is filtering out any data that does not have “grande”. The system no longer shows records with only “gran” or “grand”. Also, notice the bottom of the form is now showing the number of records displayed while the search is continuing.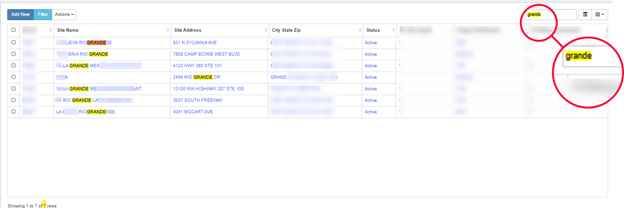
If a street address number is added, only the record containing that number and “grande” is displayed. Note that the characters did not have to be a “string”. This only happens for addresses not for text field character strings.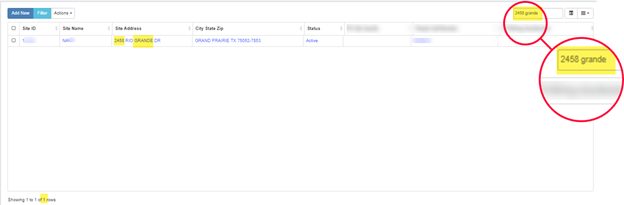
Typing just a number is not always helpful if the number occurs within other numbers.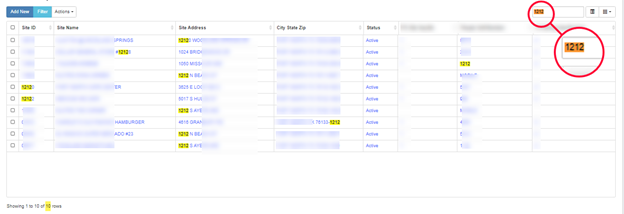
In this example, one word is typed, and the records are filtered to show text field entries.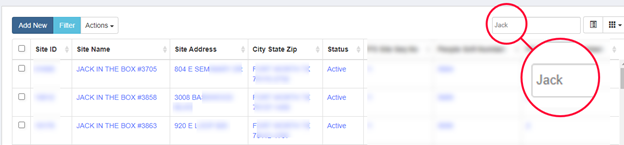
If the next word typed does not follow the first word in the character string, the search is empty.
Searching in an Embedded Form
The user clicks on the Search Button to start.
Then starts typing in the Search panel. Records will be shown below as the user types. Scroll and click on the Plus sign icon at any time or keep typing to restrict the criteria. (Ignore the Search button, if present.)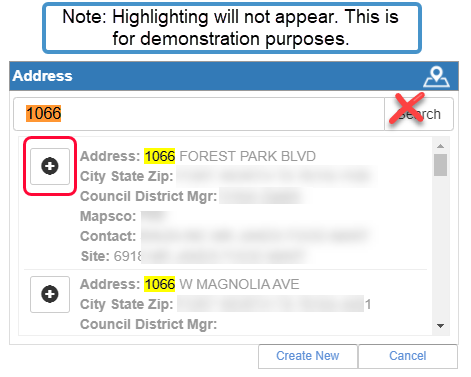
Example of restricted criteria “display as you type”.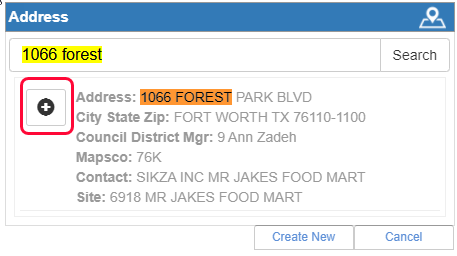
If the record does not exist, click on the Cancel button to clear the criteria.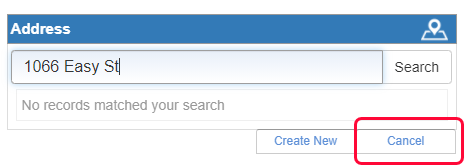
Searching in a Workflow Panel
Most Workflow panels are used to create new records that are attached to the parent document. In the case of the Contact Manager panel, contact records can be attached to multiple parent records. Therefore, searching for the contact before deciding if a new one is needed must be done. The Actions menu includes a “Search to Add” choice as well as the ability to add new records.
When contacts are attached to a parent document such as the Permit Manager, the chosen contact will also require a relationship to the type of contact, such as Owner, Billing, etc.
From a parent form that has the Contact Manager Workflow panel, click on the Actions Menu and click on Search to Add.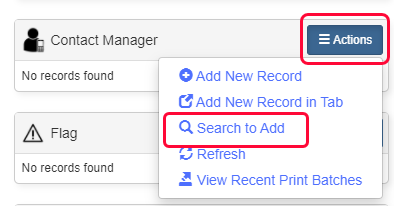
Select the Contact Type, or Types, if it is a multi-select field (use the control key to select more than one choice).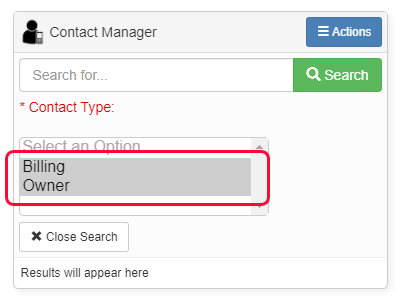
Start typing the contact’s Organization or Name or part of an address. As text is typed, the records will populate below and start filtering as the criteria changes. There is no need to click on the Search button.
Example: part of the name brings up any contact that has the word “Health” in searchable fields.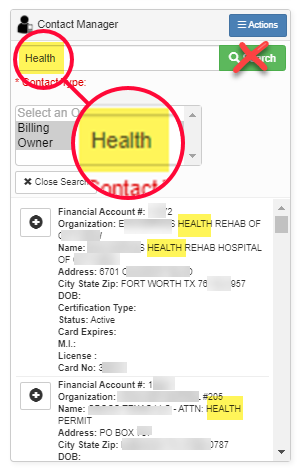
Example: Continuing to type, causes the results to change below, to display only records with “HealthSpace”.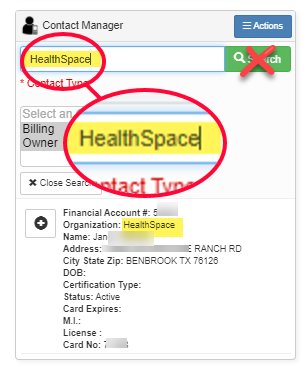
Clicking on the Plus sign icon to the left of the contact information, chooses and saves the contact to the form.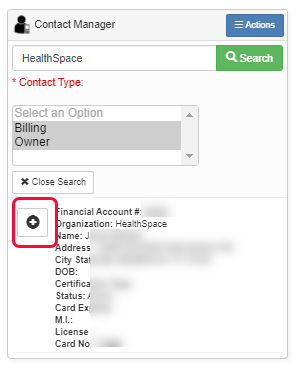
The contact record is displayed in the panel.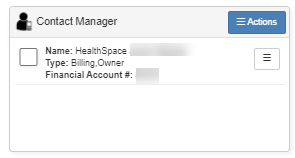
If the criteria is not found, click on Close Search and create the new contact.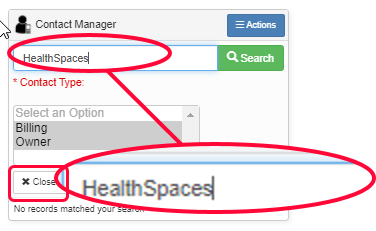
Searching from the Dashboard
When the system opens to the Dashboard (default setting) records can be searched for from the Search System… button Located on the top right-hand section of the screen under the main navigation.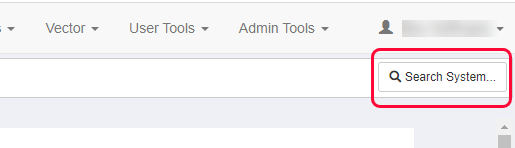
Clicking on the Search System… button opens an interface with a dropdown, listing every tool in the system.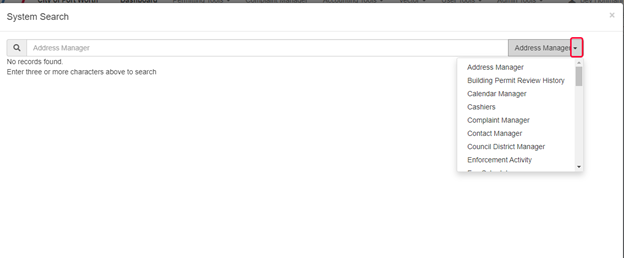
Type the search criteria in the search box to filter the records as the text is typed. The list view of the tool is displayed. There may be a slight lag as the system is searching the whole list.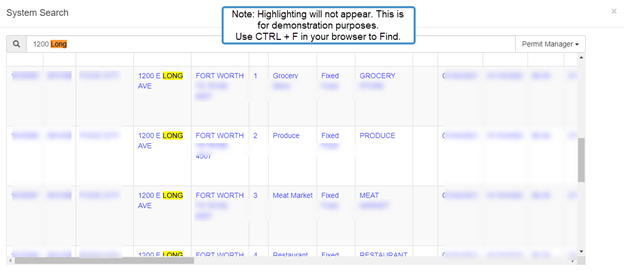
The word “Searching…” will display during the lag.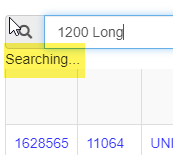
If the search has not been useful, use the List Screen of the Tool so that other actions may be used to pinpoint the search.
Searching in Version 2 Interface (Accounting Tools)
Many of the tools in Accounting Tools have a Version 2 Interface. Searching for records can be done using the Search Bar to type specific number and text characters and then search for a result using the Search button.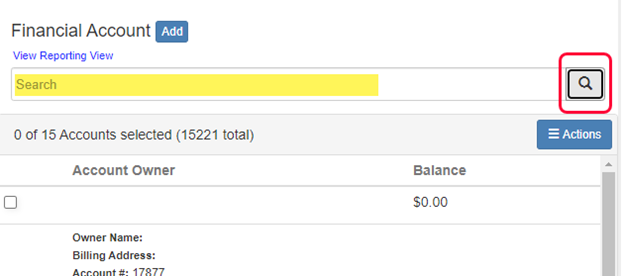
If the criteria returns many records, only 15 records are displayed in the first screen load. More records can be displayed by clicking on the Load Next… button.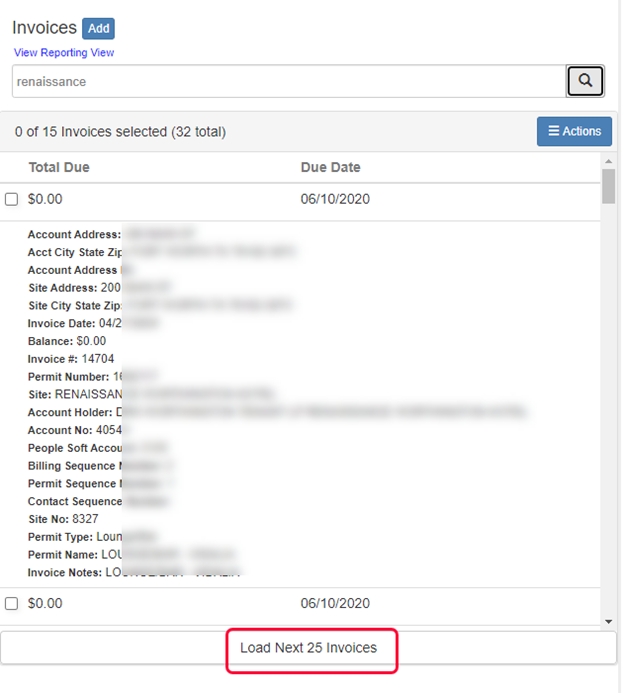
This interface does have a hyperlink to the associated List view.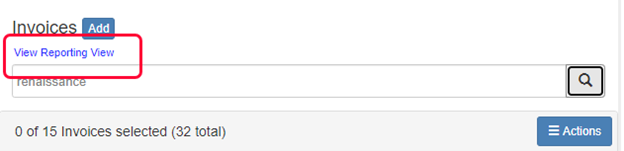
Contacts are also attached to invoices that have been created individually. Click the Search button.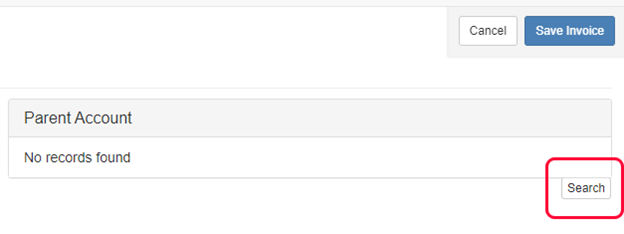
Type a search criteria in the search box to filter the records as the text is typed. Click on the Plus Sign icon to add the contact’s Financial Account.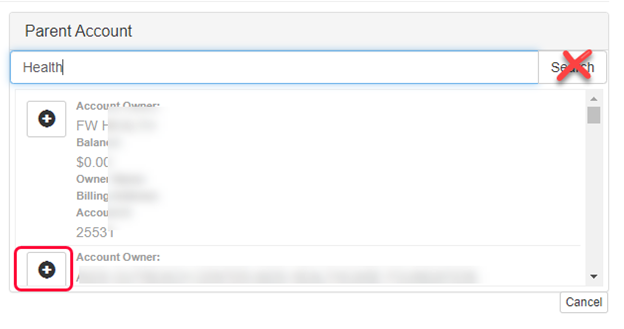
Click the Cancel button to back out.