Exporting Data and Other Actions
General Summary
Every tool in the system has a “List Screen” view. You can access the List Screen view, by going directly to a tool, like “Permit Manager”, under the navigation. The list screen view shows ALL records of that type. So, the Permit Manager list screen shows ALL permit records that are in the system.
The list screens allow you to search and filter, to find a specific record or a group of records. The list screens are key reporting views/tools within the system. Some list screens also allow the user to add new records. This is dependent upon the workflow of the system as a whole. Please be sure to review the guides that walk through the work flow, so you now how to add the different records.
Accessing a List View:
Click on any tool in the navigation.

The List Screen view for the tool comes up.

Here are the things you can do, from the list screen:
- Open a record, click the link to open and view the record.

- Search for a specific record – use “Search”. The Search feature allows you to search for a specific record by first choosing to search within a column or using the full data set in the list screen.

- Add a key word to search on, and click on the magnifying glass or <enter>, and the search will begin. It will find all records with that key word within that column or data set as you have chosen.

- Filter – this allows you to display a collection of records, based on a parameter such as “Permit Type”. Filters can be used one at a time, or in conjunction with each other. This is the best way to organize data ahead of exporting to Excel. (please see section below for detailed instructions on filtering)
Choose Filter By,

- Take an Action – The “Action” button, which is configured for each tool, allows you to take an action with the data filtered or searched on, such as exporting to Excel, Bulk Print, Bulk Update Data, etc. Please see detailed instructions in section on this below.

- Add a New Record – this is only an option on certain records, depending on workflow. When this is allowed, you will see a button to “Add New”. Click to open and start a fresh record. See more about adding a new record here: New Record

- Choose the columns and sorting for the values in the list screen.

Using the List Screen Filter Tools:
The filtering features allows for sorting and querying the data based on different data points within this tool type or parent tool. For example, for Permits, filters are typically Program Type, Permit Type, etc. Filter options are configurable and can be added for any data points needed, that exist on the tool or it’s parent.
Beyond the data points that can be used, the filter tools allows for different querying types, like searching on a single value, or searching in a range of values (like for dates). Please see details on each item and usage below.
- Accessing the Filter Options: From the list screen, click “Filter By”

- Notice the data points available for filtering. These will be different for every tool/screen. And you can add/remove options as needed via Form Builder, or by contacting your product support manager.
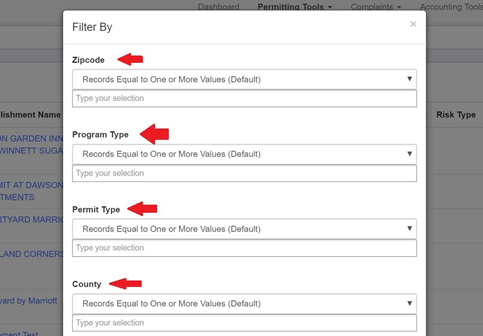
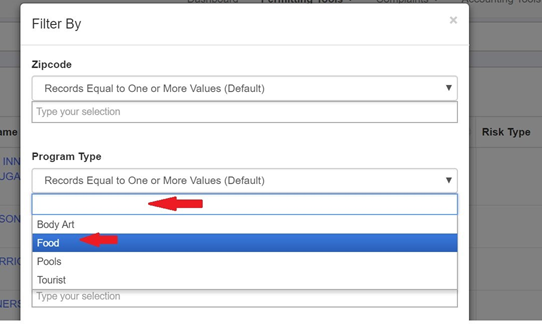
- To use a filter, first type your selection from one of the filtered options
-
Then choose HOW you want to filter off of this data. There is a dropdown selector above the spot where you selected the value to search off of. Below explains what each of these means, and how it filters your data:
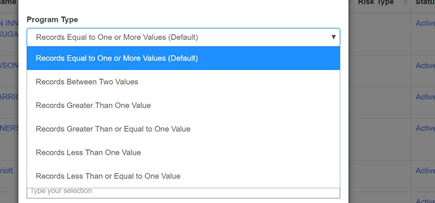
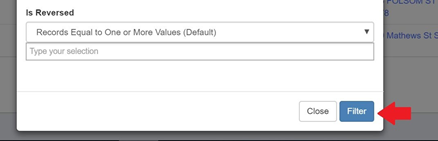
Records Equal to One or More Values (Default):
Will find all records that have the SINGLE value you selected, within this field in the record. So for Program Type for example, if you choose “Food” and/or another value, it will find all records that have that value.Records Between Two Values:
This is useful for dates, to search on a range of dates (start and end) and for number fields, for searching for a number range. For example, searching on all payments made in the date range of 01/01/2019-01/31/2019. It would look like this.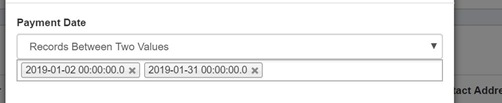
Records Greater Than One Value:
This is great for number fields filters, such as Payment Amount. This would pull back all records, where for example an Amount is more than, the value you entered. So if you wanted to pull back all payments where the Amount paid was greater than $100, this is how you would do so.Records Greater Than or Equal To One Values:
Same as above except includes the equal to value within the results. So if you wanted to pull back all payments where the Amount paid was equal to or greater than $100, this is how you would do so.Records Less Than One Value:
This is great for number fields filters, such as Payment Amount. This would pull back all records, where for example an Amount is less than, the value you entered. So if you wanted to pull back all payments where the Amount paid was less than $100, this is how you would do so.Records Greater Than or Equal To One Values:
Same as above except includes the equal to value within the results. So if you wanted to pull back all payments where the Amount paid was equal to or less than $100, this is how you would do so.Once you have selected and set your filter(s), just click the “Filter” button to pull back the results
Key Things for Filters to Keep in Mind:
- You can use one, or you can use multiple filters at time
- After you filter, you can use the keyword search to find a specific record(s) within the filtered set (IE: All the McDonald’s within the filtered range)
Taking Action on Filtered Data:
Once you have filtered out a set of data, your next step is to do something with that data. Here are options that can be done with the data filtered, using the “Action” button. You will ALWAYS have to CHECK the records to include in the action.
*IMPORTANT: You may not see all of these options on your different list screens. These are configurable and turned on based on need for each individual tool. Please contact your product manager for help configuring these Actions in Form Builder.
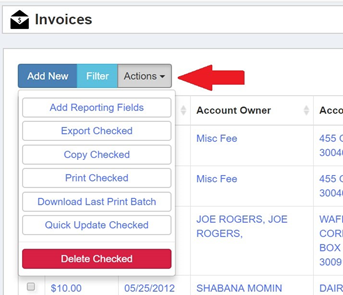
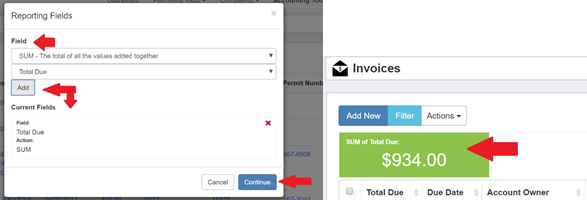
Add Reporting Fields: This option allows you to add an extra reporting query, such as summing up records. This is nice for financial related tools, or any tool where there are number fields. Choose what field you want to report on and HOW, click “Add”. Then click “Continue”
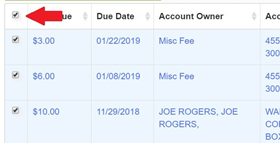
Export Checked:
This option will export the data in your filtered data that you see on the list screen to an Excel file. CHECK next to the records to export (Or Check the TOP check box to Check All), then Click the “Export Checked”. This will download an excel file of data for you.
Copy Checked:
This will create a new record, with the exact same items filled in, for modifying and saving. This might be needed for inspections, where multiple inspections are performed at a location that has multiple areas, such as a grocery store with a Deli, etc. An inspection can be performed and saved and then copied. It will open in a separate tab, change what is needed for the other area, but keep what is the same, to save time. Then be sure to SAVE the new record, for it to save. It is important to note that when you “Copy” it is not saved until you actually do click the “Save Changes” button at the bottom of the record.
Print Checked:
If you have a tool such as Permit, Inspection, Invoice with a related printed form, this can be used to do create a bulk print file based on what has been filtered. For example, you may need to print all the Permits out for all of those permits that have recently paid their permit renewal. This action creates a downloaded ZIP file, where the print forms are in PDF format.
Download Last Print Batch:
This directly relates to the above, and allows you to print the last batch that was done in history.
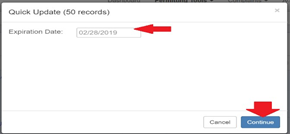
Quick Update Checked:
In Form Builder, you can configure what fields on a given tool, that you might need to bulk update data for. Good examples of this are:
- Inspector Assigned on the Permit when you need to quickly update a batch of permits in a certain area, that should be assigned to an inspector
- Expiration Date on the Permits for a specific month, that paid their renewal fee.
For fields configured for this, when clicking to Update checked, you will get the option to fill in the field that needs updated. Fill in the value(s) and then click “Continue”. The records will then process. Sometimes this process takes a few minutes.