Adding New Users to the System
Setting Up Groups of Users in the Permissions
Adding New Users to the System
In the upper navigation, see the section for “User Tools”

Click on the “User Manager”

Click the button to “Add New”
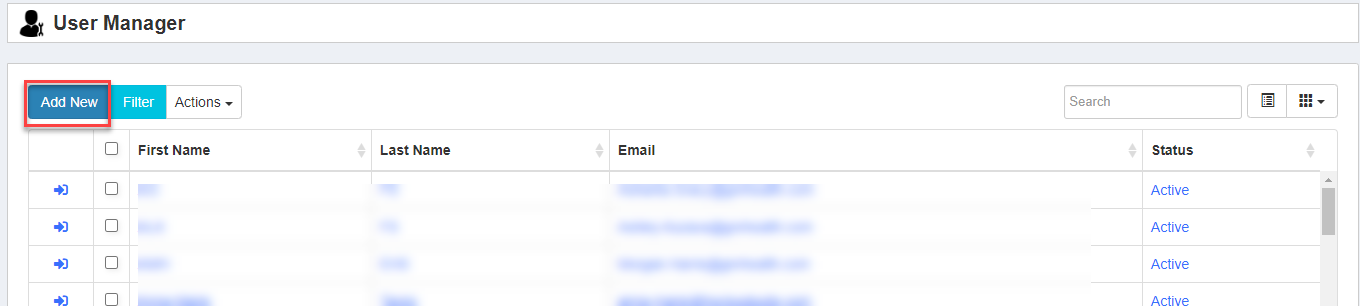
A user account requires their email, and First and Last Name.
When creating the account it is best to set a temporary password for the user. You may also manually assign a password, by typing it in. But for brand new users, it is best to do a temporary password.
Once all info is entered, and the Temporary Password is clicked – Click “Save Changes”
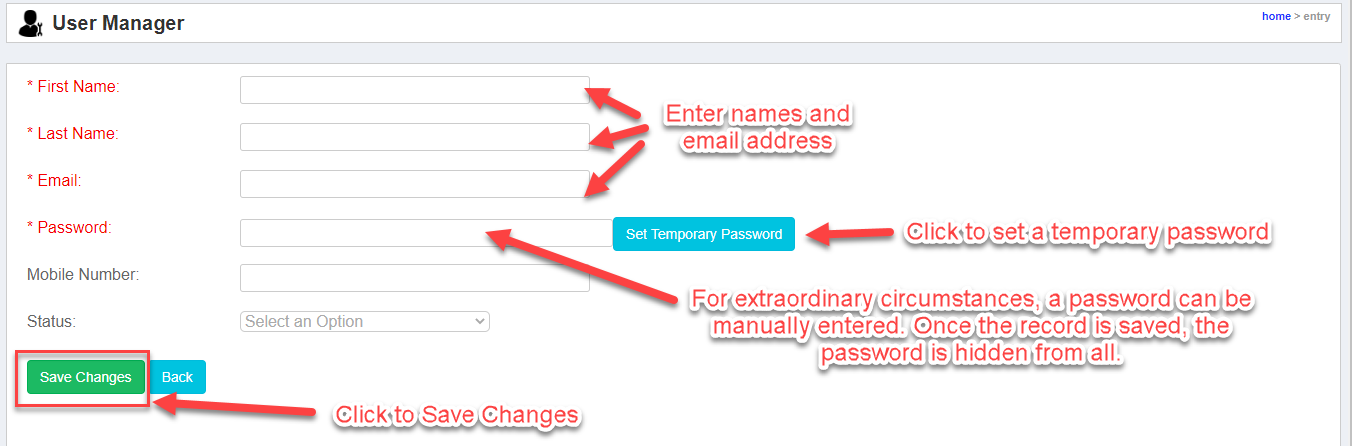
When the user record is saved, an email goes out automatically from the Cloud, to the new user’s email. It will give them the URL to the system, as well as their temporary password. The user will log in, and then change their password to something unique to them.
Resetting a User’s Password
If a user ever forgets their password, or if they feel their password has been compromised, and they need a new one, you can go in at any time, and set a new temporary password or set one manually.
In the upper navigation, see the section for “User Tools”

Click on the “User Manager”

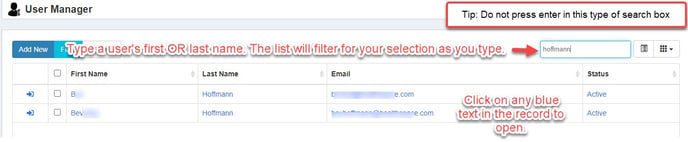
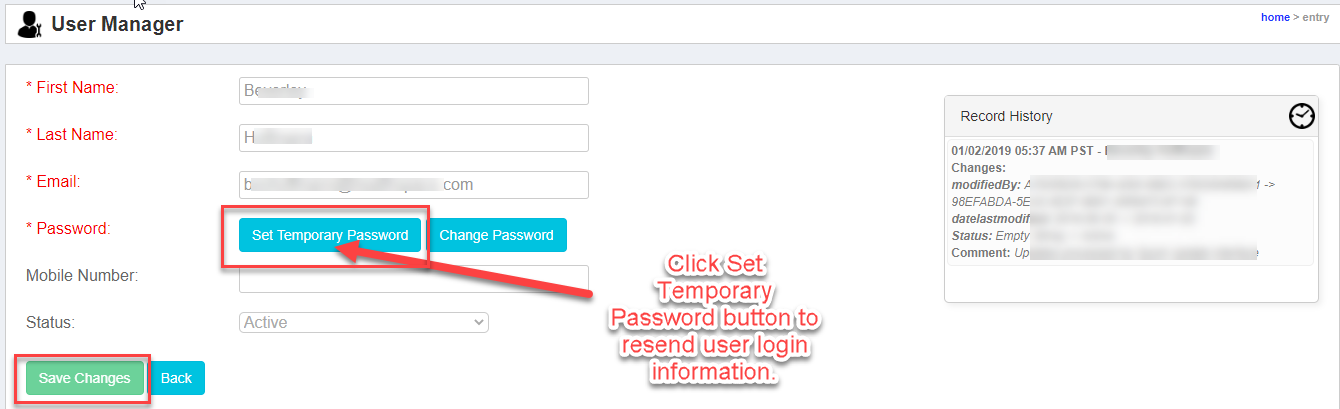
Search on the user’s name, Click to open their record
Click the button “Set Temporary Password” OR manually enter a new password for the user by clicking “Change Password” (the temporary password is the recommendation).
Click to “Save Changes”. The system will then email the user their new temporary password. If a password was typed in, an email will NOT be sent.
Setting a User’s Permissions
When a new user is set up in the system, they start out having access to nothing in the system. In order for a user to have access to any of the tools within the system, they must be given permission via the Permissions Manager tools. In the upper navigation, see the section for “User Tools”

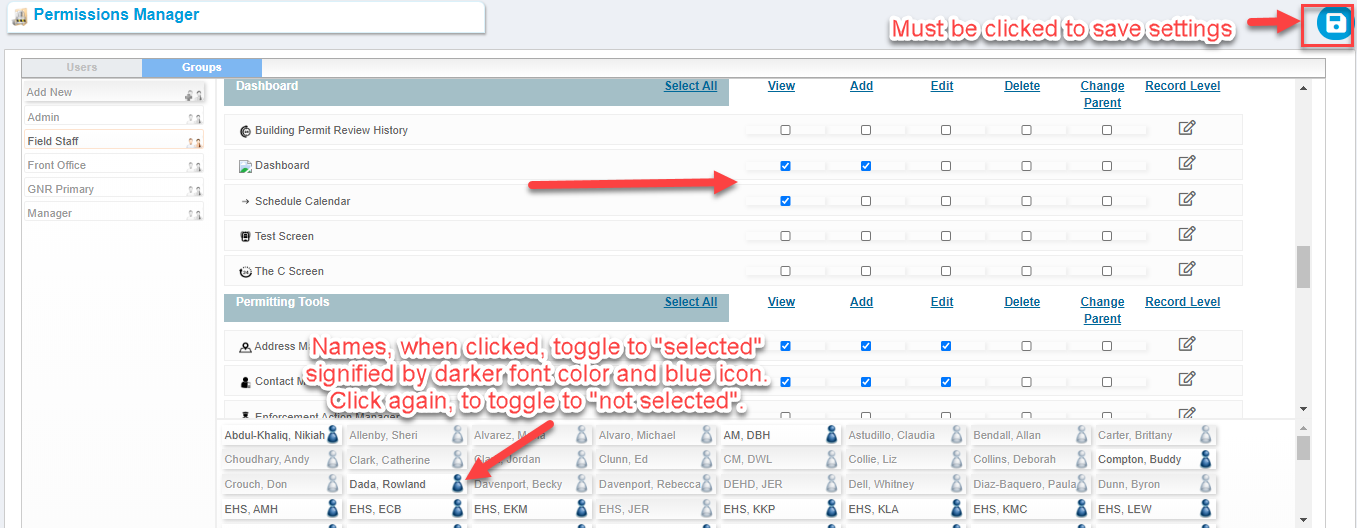
Click on the “Permissions Manager”

The Permissions Manager has a list of Users as well as Groups that can be custom created to add users with identical permissions.

For individual users, click on a name – the grid will then load on the right.
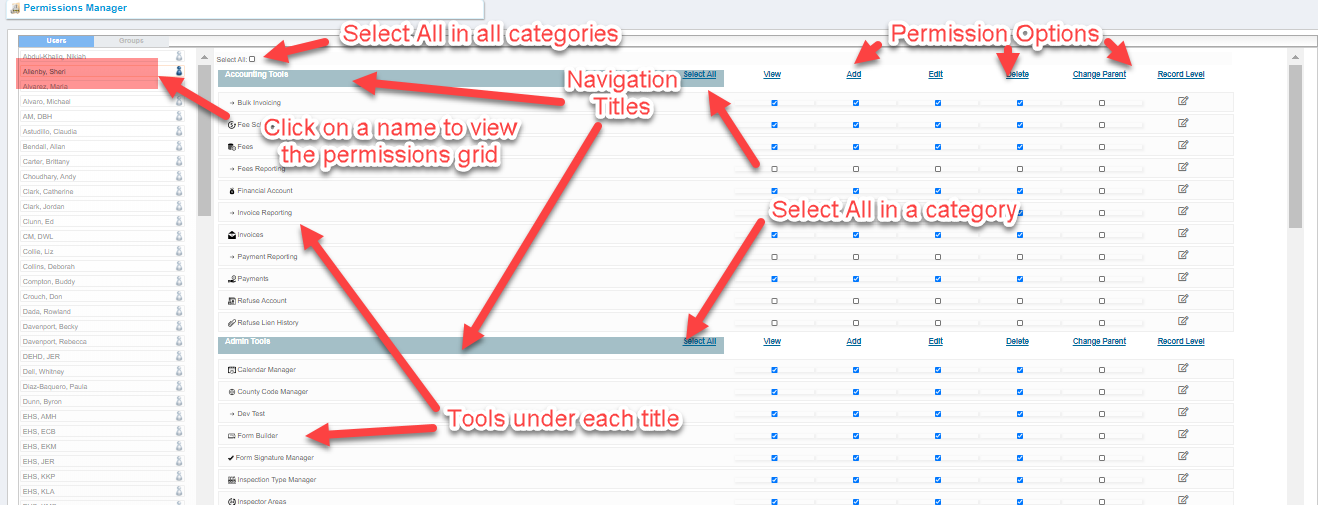
Tick in each box to choose a tool in the system, or use the Select All box and then deselect a tool, as to whether the user should have View, Add, Edit or Delete permissions, for any of the tools. Each selection is unique for each user. Note that Change Parent should not be checked for most users and Record Level is defaulted to no restrictions.
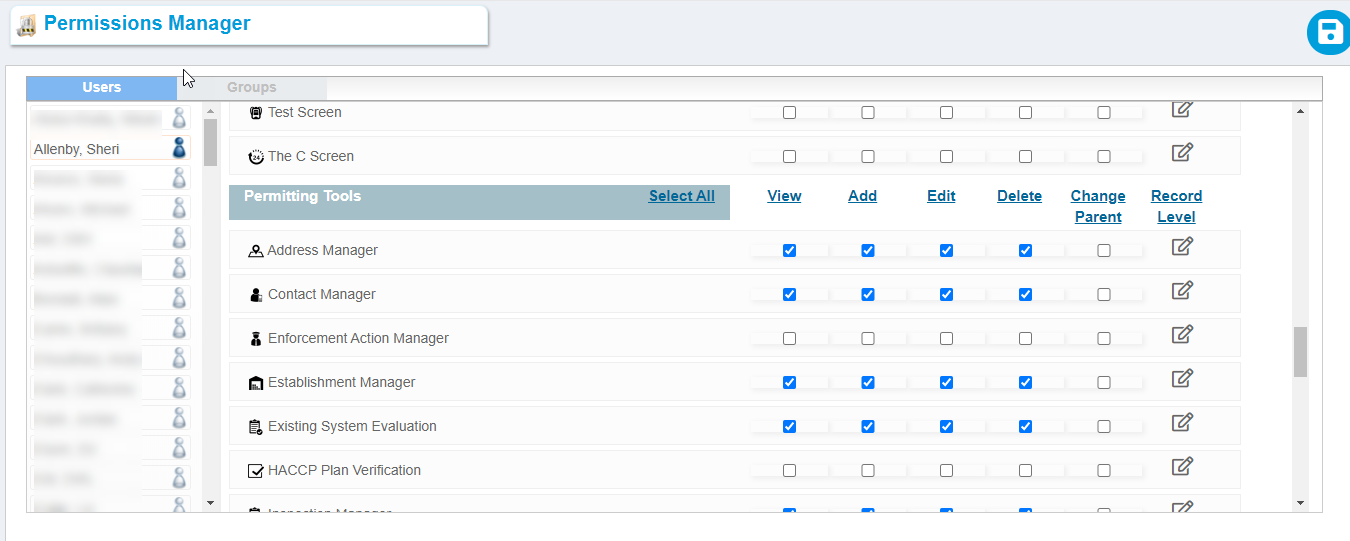
Once completed, click the button that looks like a floppy disk to SAVE in the top right corner.

Important Note: No one should have “Delete” permissions, except for maybe one or two Administrator level users at the department.
Setting Up Groups of Users in the Permissions
If you have a group of users, that all need to have the same set of access/permissions to the different tools (such as Inspectors), you can use the feature in the Permissions Manager, to create a group, and set the permissions one time, and then assign users to it. This saves time, as well as keeping permissions uniform if there are groups of users that need the exact same permissions.
In the upper navigation, see the section for “User Tools”

Click on the “Permissions Manager”

Click on the “Groups” tab
Click to “Add New”

Name the group and Save

Set the Permissions via the Grid, Select the users that should be in the group; Once completed, click the button that looks like a floppy disk to SAVE.