Configuring an Existing Screen in the System
Short Description of Each Tool in the Form Builder
Article: How to Configure Fields in Form Builder
Article: How to Configure List Screens in Form Builder
Article: Setting Permissions for Existing and New Tools
Article: How to Add New Forms from Form Builder to the Main Navigation (Menu)
Form Builder Overview
The Form Builder tool allows the system Administrator(s) to modify and configure the tools (data entry screens) within the system. Form Builder is an Administrative Tool. It is usually found in the Navigation under Admin Tools.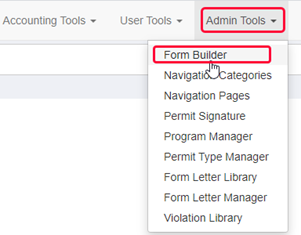
Configuring an Existing Screen in the System
The configurations are similar for all screens. The screenshots below show how to manage a tool within the system and are applicable to all tools that may be within a specific system.
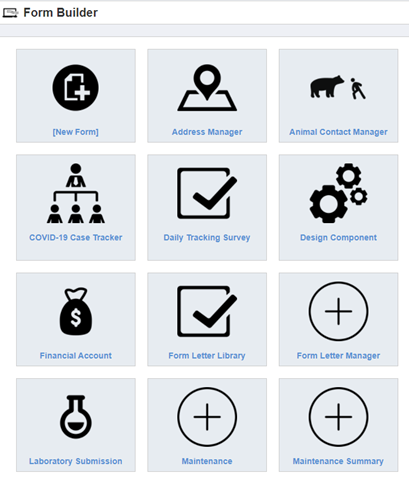
From the main Form Builder screen, select a tool to “Edit” by clicking anywhere on its box.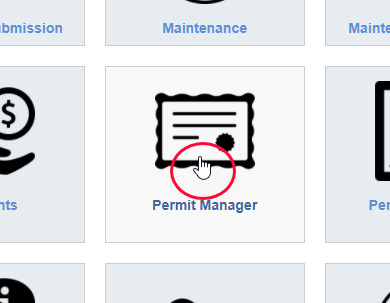
The form with all configuration options opens. Click to open or select from dropdown fields.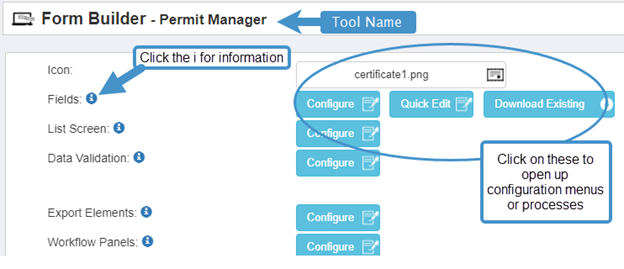
Information example: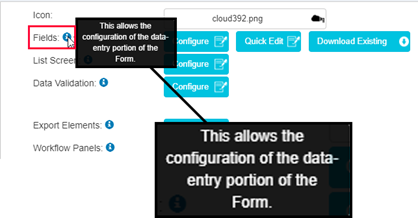
To Save or Discard any changes made in a Form Builder, scroll to the bottom of the page on the middle scroll bar.
Short Description of Each Tool in the Form Builder
Icon
The icon is the image that appears for this tool in the main Form Builder view. This image also appears for the tools on the List Screens, and in the upper right-hand corner of related data panels.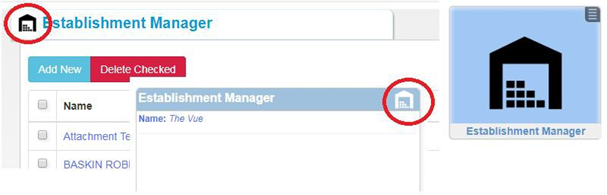
Fields
This where all the data points for the input screens are managed. The features of this tool are:
- ADD, EDIT, or REMOVE a data input point from the screen. (Configure)
- Add rules and requirements to the fields from this section. (Configure)
- Upload new fields instead of adding. (Quick Edit)
- Produce a spreadsheet list of all fields and their properties to edit or add new fields using Quick Edit. (Download Existing)

List Screen
Each Form Builder Tool has a list screen in the system. Fields from the current tool as well as from other tools are displayed in a matrix.
This is the summary list screen that has a filter applied. Specific routines are accessed through the Actions dropdown menu.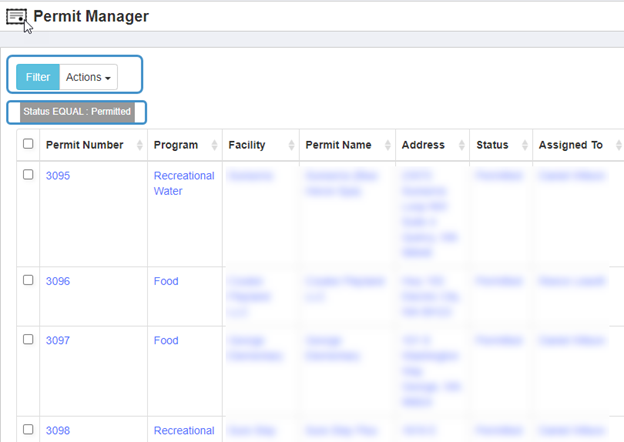
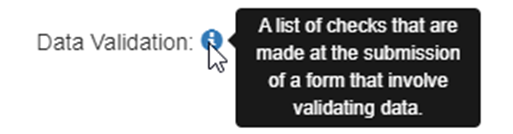
Data Validation
This tool will be used by HealthSpace Staff.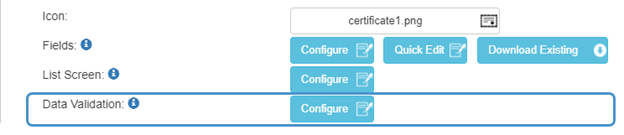
Export Elements
If Allow Export option is YES, the columns that will be displayed in the output can be organized.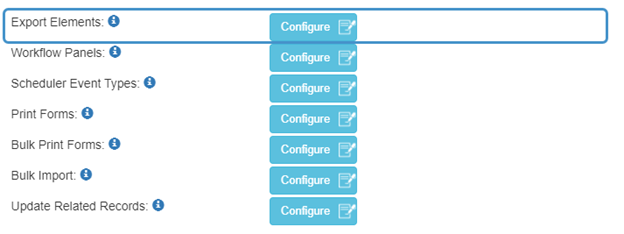
Workflow Panels
Related data panels are the relational aspect of the database. Please be sure that anyone who modifies these relationships truly understands how relationships between tables in databases work, and have been trained before adding, editing or removing a related data panel. Consult HealthSpace staff for training.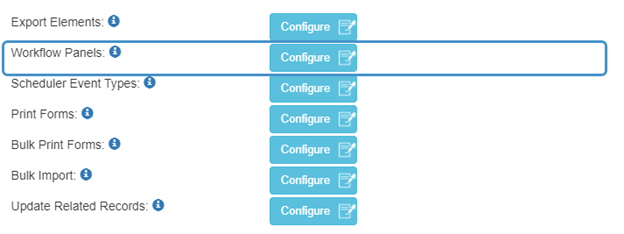
Scheduler Event Types
Defines an action that will be performed after a record is saved, Such as schedule an inspection or send an email or a text.
Include In Printable File Name
Printforms such as permits can be printed as individual files by selecting checked records in the list view. This feature adds the contents of a field name as part of the filenames generated.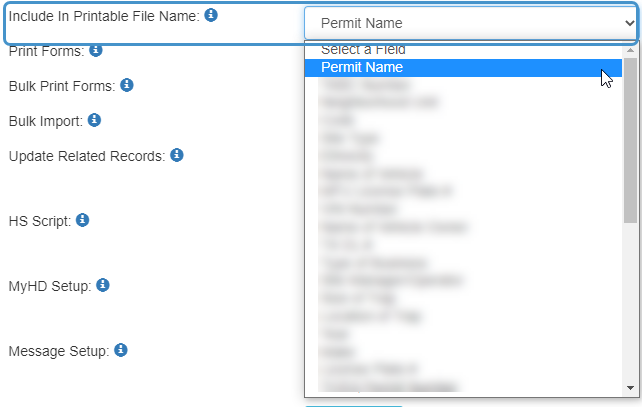
Print Forms
Printforms can be described as any static image file where fields from the Form Builder or related Form Builders, where the data is in the List Screen of the Form Builder being used, are populated with mapped fields that are viewed from a form screen and can be downloaded, emailed or printed.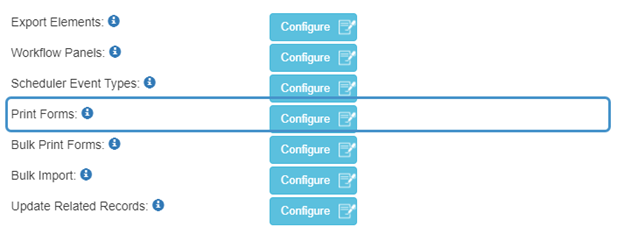
Bulk Print Forms
This feature is not currently available for front-end users. 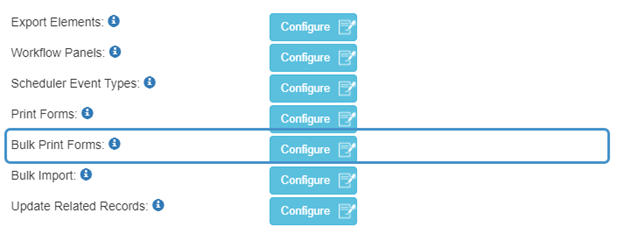
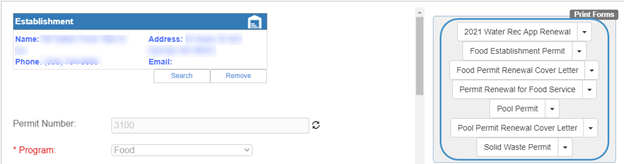
Example of how Bulk Printing is utilized.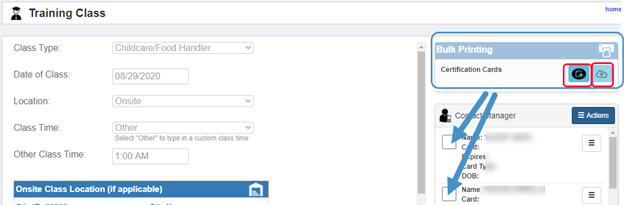
Bulk Import
This feature will be implemented by a HealthSpace representative or HS support staff.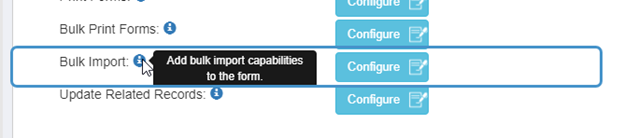
Bulk Import allows the use of a .csv or .xlsx file to upload to a tool. After configuration, the item will show under the Actions menu of a List Screen. An example is shown here: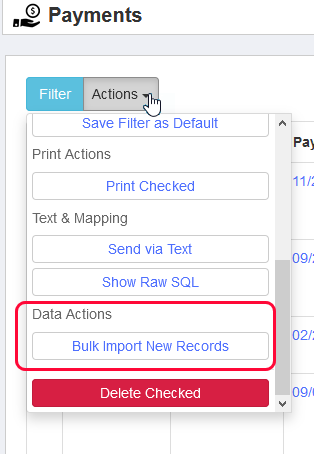
Update Related Records
This feature will be implemented by a HealthSpace representative or HS support staff.
This allows for the updating (changing) of a field in another tool when a record is saved in the configured tool. Often it is based on some type of calculation.
HS Script; MyHD Setup; Message Setup; and External API
All of these will be utilized by HealthSpace Project Managers according to the services utilized in a client’s contract.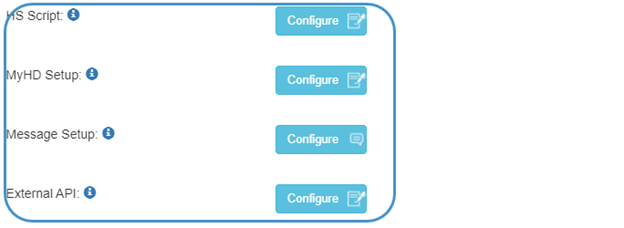
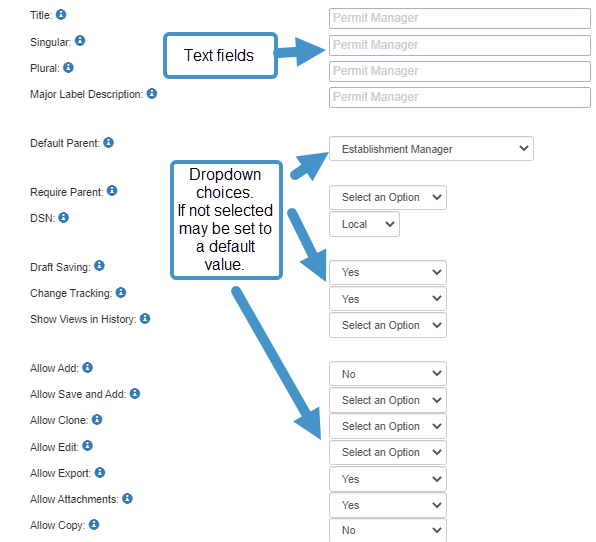
Title/Singular/Plural/Major Label
These labels represent the name of the tool. These can be customized by editing each box. The Title will show on the Navigation and as the name of the tool.
Default Parent
This is set during the planning stages. Do not edit. For new tools leave it blank. This example is from the Inspection Manager Form. The Inspection Manager is a child of the Permit Manager, therefore the Permit Manager is the Parent.
Require Parent
This is a control for data entry. Leave it for the default.
DSN
This will not need to be modified. For any new tools you create, you can leave it blank. And we ask that you do not touch for existing tools.
Draft Saving
This is a toggle option. For any of the screens/tools within the system, you can enable a “Save As Draft” option, that allows the user to save a record as a draft, before officially submitting. Saving as a draft, allows a record to be saved, without all the required fields populated. The record is flagged in the system as a draft.
Change Tracking
This is a toggle option. For any of the screens/tools within the system, enable “Change tracking” option, to require users to make a comment if they change a record, and the system keeps track of all changes made to the record.
Show Views in History
This is a toggle option. A written entry in the History Panel will log and describe such actions as emailed, printed as PDF etc. by the user. Related to Show History Option.
Allow Add
Some Tools are standalone or do not need a parent record. Those tools will have this option as “Yes”. This option allows admin to make sure such items as inspections are created from the Parent Permit in the Workflow panel.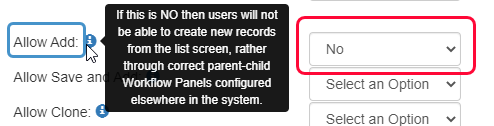
Allow Save and Add
With this option, a new record will automatically open after saving the previous. This is useful for small list forms.
Allow Clone
Do on activate this tool. See Allow Copy option.
Allow Edit
The default for this option is Yes. Selecting No causes a saved record to be locked to editing.
Allow Export
This is a toggle option. Setting to Yes allows records from this tool to be exported from the list screen. See Export Elements.
Allow Attachments
This is a toggle option. For any of the screens/tools within the system, enabling the “Attachment” feature allows for uploading and attaching outside electronic documents to the records within the tool. Photographs uploaded with HS Touch inspections are stored in this panel.
Allow Copy
This option allows existing records to be copied and then edited and saved as new records. Only certain tools should Allow Copy as many records should be created from the parent record.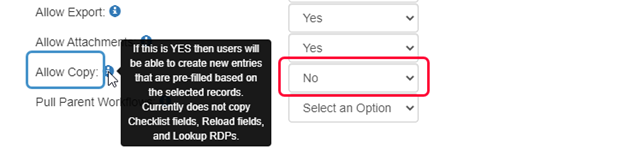
Pull Parent Workflows
This feature will be implemented by a HealthSpace representative or HS support staff.
Record Assignment
This is a toggle option. For any of the screens/tools within the system enabling “Record Assignment” allows records within the tool to be assigned to a user, and the record assignment, will show up in the “Scheduler” panel on the Dashboard.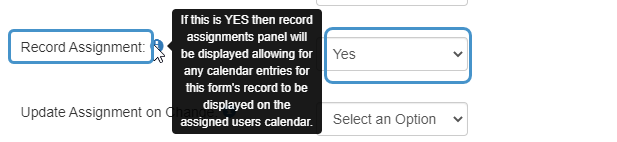
Update Assignment on Change
This feature will be implemented by a HealthSpace representative or HS support staff.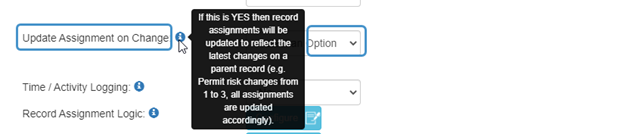
Time / Time Activity Logging
This feature will be implemented by a HealthSpace representative or HS support staff.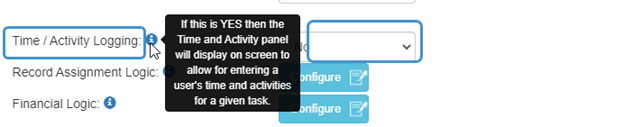
Record Assignment Logic
This feature will be implemented by a HealthSpace representative or HS support staff.
Financial Logic
This feature will be implemented by a HealthSpace representative or HS support staff.
Show History
This is a toggle option. For any of the screens/tools within the system, you should enable “Show History” which is displayed with the Workflow panels showing details of saved records.
Use as Dashboard
Any of the tools can be used as a dashboard which is the first page opened upon login. But this is typically set to ‘No’.
Version
There are two versions of the system interface. You can intermingle the two designs and set them for different tools. For some tools, one interface will be preferred over another. Also, views for the same data can be created in both versions. The Accounting Tools are examples of one Tool with 2 views. The Version 1 display is referred to as a “Reporting View”.
Display Scheduler Events
This feature will be implemented by a HealthSpace representative or HS support staff.
Form Replication
This feature will be implemented by a HealthSpace representative or HS support staff.